Electrical Panel Upgrade in San Diego County | Landers Electric
With nearly 20 years of electrical experience, Landers Electric specializes in reliable electrical panel upgrades in San Diego County, serving Oceanside, Vista, Carlsbad, and surrounding cities. Our licensed electricians handle everything from 100–400 amp service upgrades to Zinsco and Federal Pacific breaker box replacements and SDG&E permit coordination. Homeowners and businesses trust Landers Electric for safe, NEC and CEC code-compliant installations done right the first time.
📞 Call Now For A Quote Over The Phone
📱 Or Text Us Anytime
Looking For A San Diego Electrical Panel Upgrade?
Look no further!
Landers Electric specializes in upgrading electrical panels all throughout San Diego County.
Whether your electricity is fed from above your house or underground, we can help you through the entire process.
The goal of this article is to help you think about why you might need an electrical panel upgrade and what to expect during the panel upgrade process.
It is imperative to state that electrical panel upgrades are extremely technical and dangerous and should never be performed by an untrained professional.
The information contained in this article is strictly informational.
When hiring an electrical contractor be sure to verify their contractor license status and that they hold a general liability insurance policy.
Before we get to the specifics of the electrical panel upgrade process, it is necessary to answer a few questions you might have.
With that, let’s get started.
If you use links in this article, Landers Electric might make a small commission (money).
Electrical panel upgrade for electric vehicle (EV) charger installation?
Many electric vehicle (EV) chargers require a dedicated 40–60 amp breaker. If your current electrical panel doesn’t have the capacity or available space, you may need a panel upgrade before installing a charger. This is one of the most common reasons San Diego homeowners call us for panel replacements.
When it comes to EV chargers, our experience shows that a hardwired unit is more reliable and safer than a plug-in model. Hardwiring reduces outlet wear and ensures the charger operates at its full capacity without interruptions.
For homeowners ready to move forward, here’s the EV charger we recommend based on reliability and ease of use:
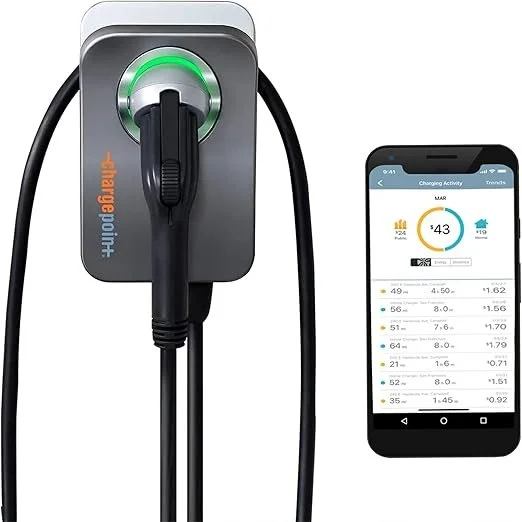
Planning to install an EV charger? In most cases, we can determine what size panel you need and provide a quote with just a phone call. 📞 Call Landers Electric today at (760) 690-7517 — or Text Us anytime and we’ll get right back to you — we’ll check your panel’s capacity, handle the permits, and make sure your upgrade is done safely.
DO YOU NEED AN ELECTRICAL PANEL UPGRADE?
Below are a few reasons you might need an electrical panel upgrade or replacement.
Breakers keep tripping
Melted buss bar from a faulty circuit
Burning smell coming from electrical panel
Electrical panel is deteriorating
More amperage is needed for added loads (electric vehicle, oven, fireplace, heat pump, mini-split etc..)
These are a few of the many reasons you might be thinking about upgrading your electrical panel. Below are some pictures of electrical panels that were in desperate need of an upgrade.
The electrical panel and wiring were in really bad shape. CLICK HERE for more information on electrical wiring.
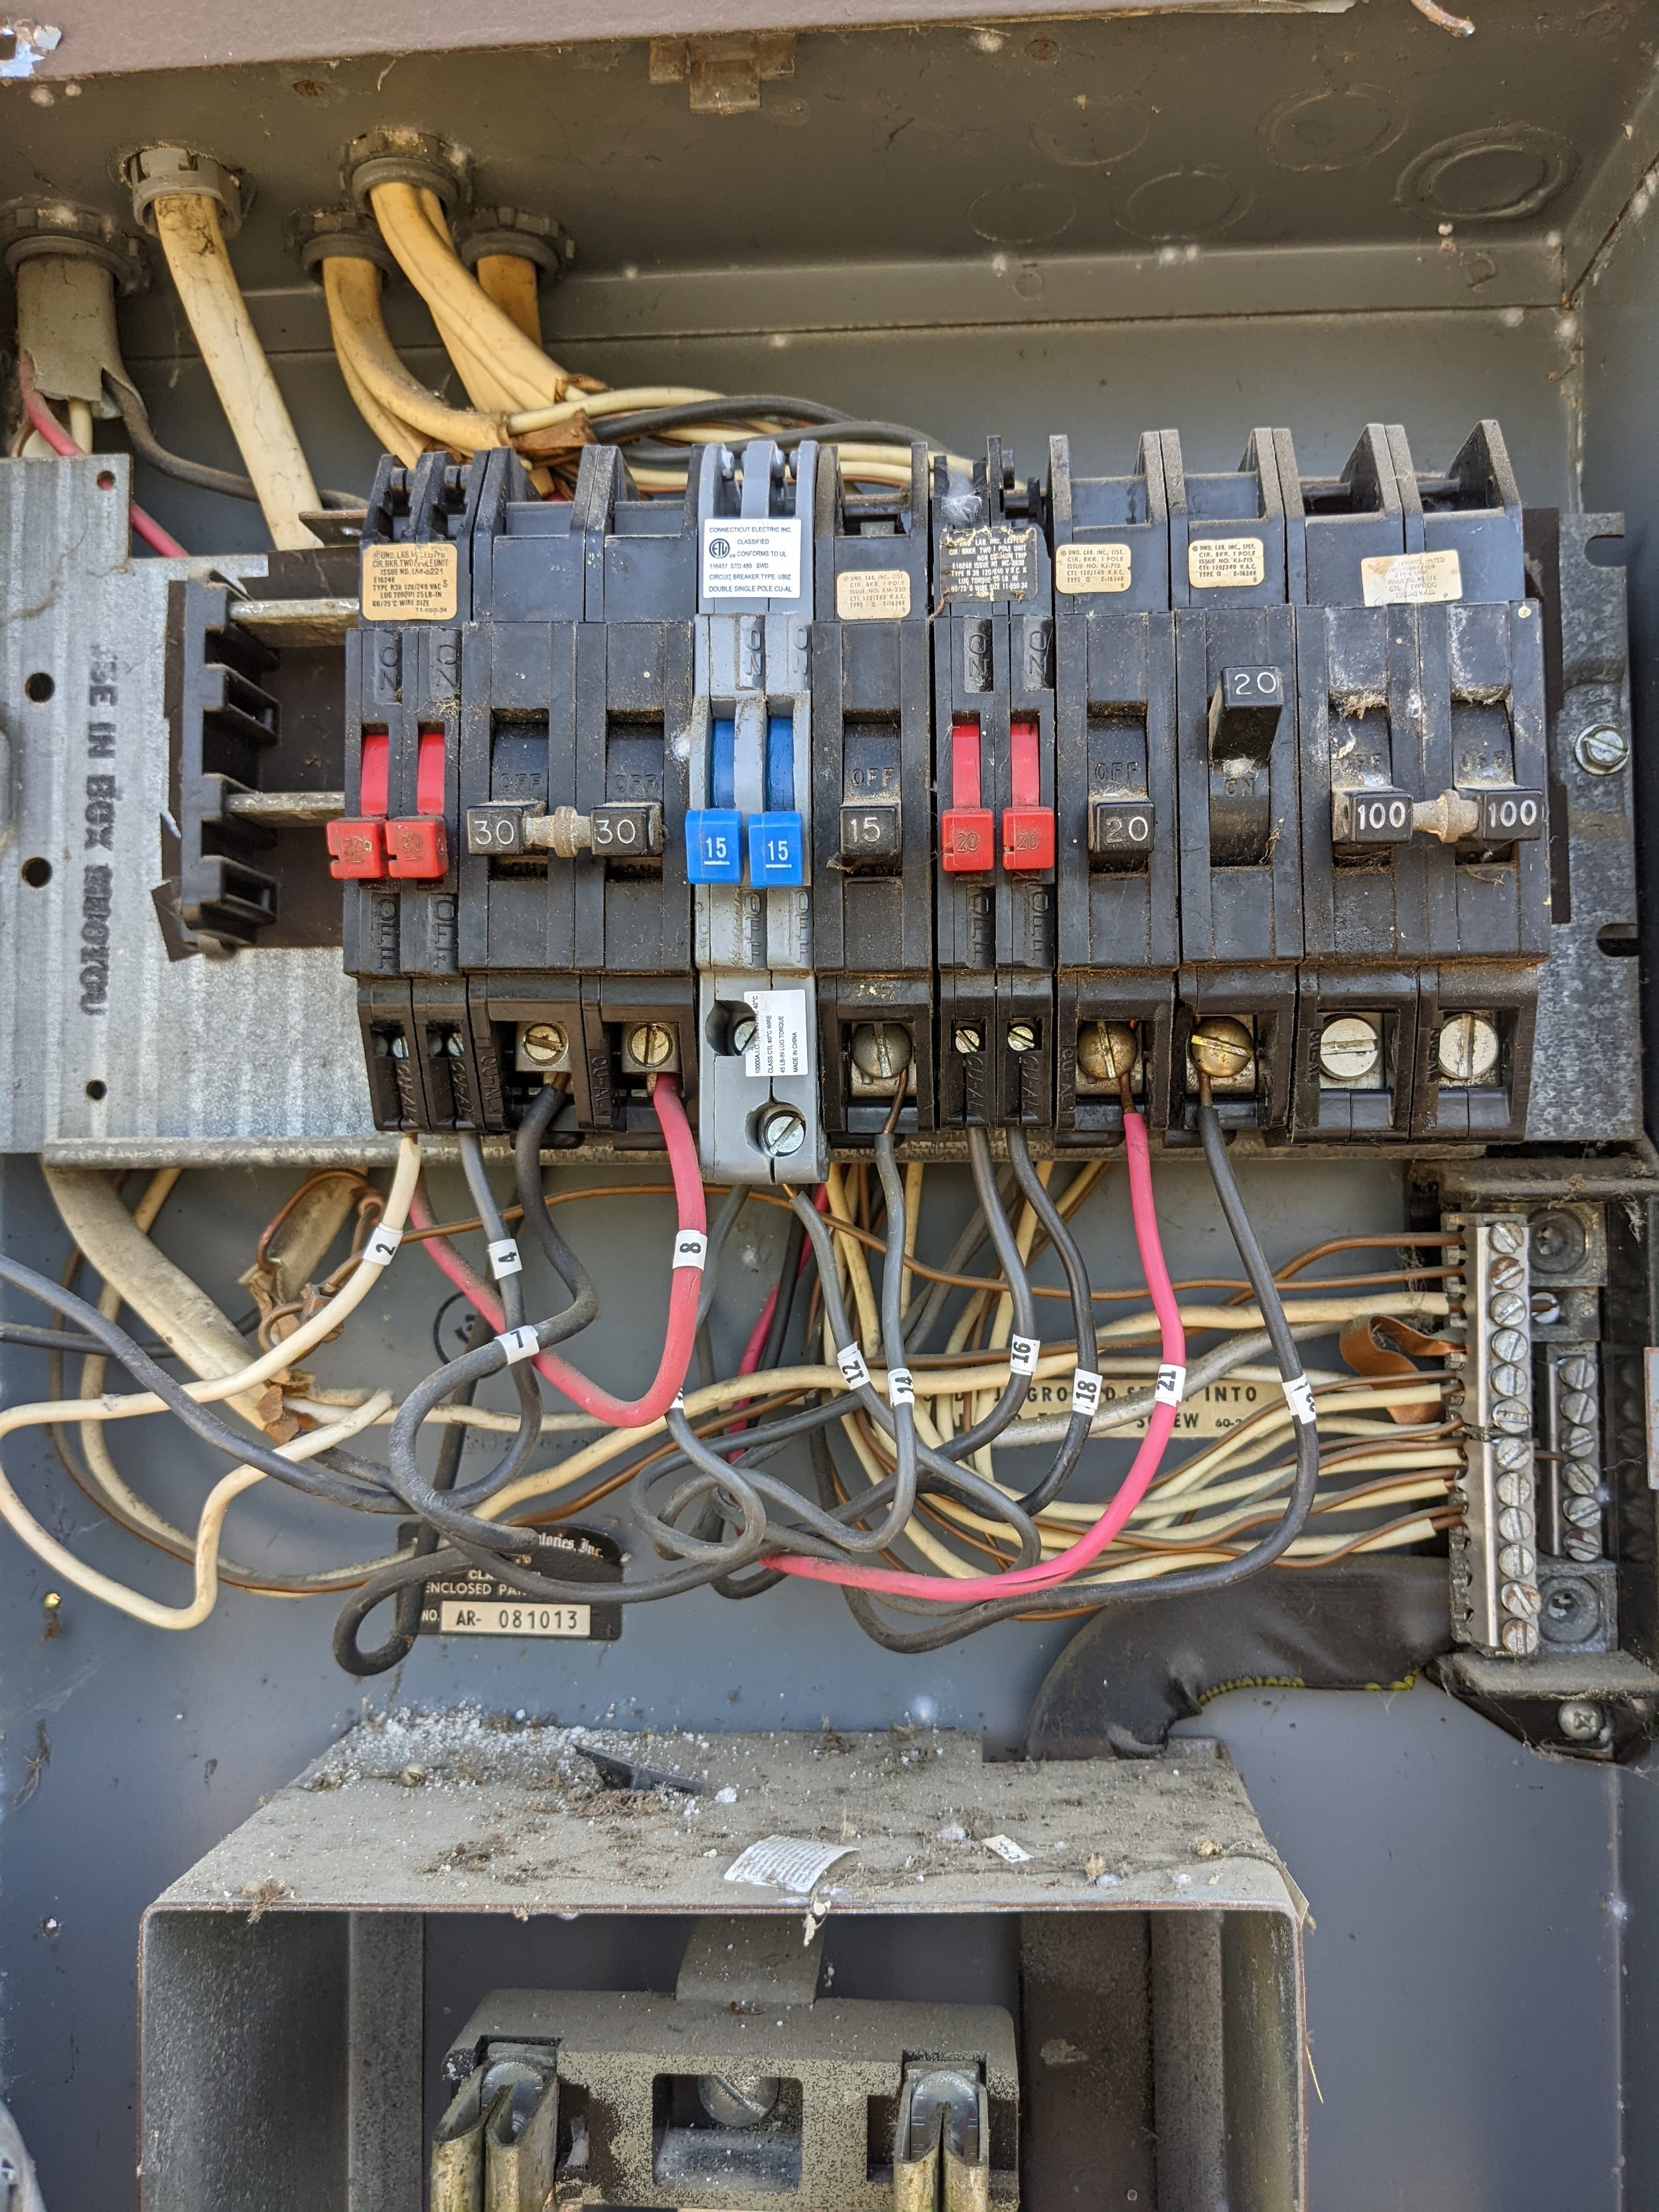
Electrical Panel Upgrade Old Zinsco Panel 1

Electrical Panel Upgrade Old Panel 2

Electrical Panel Upgrade Old Zinsco and Federal Pacific Panel 3
Is there an advantage to upgrading my electrical panel?
In short, Yes.
Many people buy a new home and decide to spend their money on strictly “cosmetic” upgrades.
One thing to keep in mind though, especially with electrical upgrades, is the importance of the backbone of your electrical system.
The backbone consists of all the wires and materials you can’t see, the electrical panel being the main component.
It’s not pretty. It’s not going to impress your friends, or make your bathroom look modern and up to date, but a properly operating electrical panel is going to ensure that all the new light fixtures, smart switches, ceiling fans, and other components you install continue to operate without interruption for many years to come.
Renovating your entire home or apartment building? CLICK HERE for the ultimate guide to home improvement.
WHAT SIZE ELECTRICAL PANEL DO I NEED?
Electrical panels are sized in AMPS. In short, this is how much power you use from day to day. Which electrical panel you choose will vary depending on your electrical needs today and your plans for the future.
Below is a breakdown down of some of the most common electrical panel options and why you might choose one over another.
This is not a comprehensive list, but can help to give you an idea of which electrical panel you should choose.
125 AMP Electrical Panel Upgrade or Replacement
- Not adding any electrical load and simply want to replace your existing electrical panel
- Your 100 or 125 amp electrical panel is damaged and needs replacement
- Have an underground fed electrical panel and don’t have the budget for a 200 amp upgrade200 AMP Electrical Panel Upgrade or Replacement
- Not adding any electrical load but have plans to in the future
- Looking to add 1 or 2 electrical appliances and 1 electrical vehicle charger
- Installing a larger capacity photovoltaic (solar) system400 AMP Electrical Panel Upgrade or Replacement
- Not adding any electrical load but need a 400 amp electrical panel replacement
- Installing 2 electric vehicle chargers and have many other electric appliances in the home
- Looking to “electrify” your entire home
Not sure what size panel is right for your home? Most homeowners don’t want to calculate load demand. Give us a quick call at 📞 Call Landers Electric today at (760) 690-7517 — or Text Us anytime and we’ll size it for you over the phone.
HOW MUCH DOES IT COST TO UPGRADE MY ELECTRICAL PANEL?
The cost associated with upgrading your electrical panel can vary widely depending on your location and specific installation requirements.
Below are the two most typical cost ranges in the North County San Diego Area.
Overhead Service (Power lines above your house with a service drop connecting to your electrical panel above your roof)
$3500 - $5500
Underground Service (No power lines above. electrical panel fed underground)
$7000 - $20,000
The Electrical Panel Upgrade Process
Now that we have covered a few questions you might have and you’ve chosen the size of your electrical panel upgrade, it’s time to get started with what to expect in the process.
Were going to cover the whole process from start to finish including differences between overhead/underground electrical panel upgrades.
Below is an outline of the electrical panel upgrade process for your reference. You can click any of the links to jump to that specific section.
Are You Ready?
Here we go!
San Diego Electrical Panel Upgrade Process (Step-by-Step Guide)
Request Service Change From San Diego Gas & Electric (SDG&E)
Start your San Diego electrical panel upgrade by submitting a work order request with SDG&E to change or increase your service.Waiting Period
After submitting, SDG&E assigns a planner who designs your job and specifies requirements like conduit size, meter height, and panel location.Apply For A City Permit
A permit is required for all electrical panel installations in San Diego. This ensures your upgrade meets NEC and local code compliance.Schedule Pre-Meet With Trench Inspector (Underground Service Only)
If your panel is fed underground, SDG&E’s trench inspector reviews the conduit route before digging begins.Dig Trench & Install Conduit (Underground Service Only)
Once approved, your electrician excavates and installs conduit for the new underground electrical service.Trench Inspection & Backfill (Underground Service Only)
SDG&E inspects the trench and conduit before final backfill and restoration of driveways, sidewalks, or streets.Schedule Disconnect/Reconnect
Your electrical contractor schedules SDG&E to disconnect power on installation day and reconnect after inspection.Utility Company Power Disconnection
SDG&E arrives to disconnect power at the utility source, allowing safe removal of the old panel.Install Grounding/Bonding System
New electrical panels in California require ground rods, cold water bond, and NEC-compliant bonding for safety.Electrical Panel Removal & Installation
The old panel is removed and replaced with a new, properly sized electrical service panel.Repair Stucco/Siding
Cutting into stucco or siding for the upgrade requires patching and waterproofing before final approval.Pass Final Inspection
The city inspector reviews the entire project. Once approved, SDG&E restores permanent power to your home.
OVERHEAD/Underground ELECTRICAL PANEL UPGRADE PROCESS
Step 1: Request Service Change From San Diego Gas & Electric
To get your project started, you must first request a change to your existing service from your utility company.
Below are the steps to do this.
Fill out all the necessary information for your installation.
Review all the forms and click submit
This paperwork is usually included in the cost of your electrical panel upgrade so no need to fill out the paperwork yourself.
SDG&E work order request form example for service change – San Diego
Electrical Panel Upgrade SDG&E Work Order Request Step 2
Electrical Panel Upgrade SDGE Work Order Request Step 3
Step 2: Waiting Period
Once you have requested a work order, the waiting game begins. How long you must wait depends on your utility company’s availability.
After the waiting period, your project is assigned to a “planner”.
This planner will come out to your home and assess the area and design your job.
Once complete, the planner will email a detailed report (called a work order) with the requirements for your electrical panel upgrade.
This includes:
Panel Location
Conduit Size
Clearances
Meter Height
Trenching Route & Depth (underground service only)
Once a work order is received from the utility company, it’s time to apply for a city permit.
Step 3: Apply For A City Permit
After you have received the work order from your utility company, you must contact the city and pull a permit.
A CITY PERMIT IS ALWAYS REQUIRED when upgrading an electrical panel.
There are many so called “electricians” who will quote you a much lower price and tell you it’s not necessary to wait all the time for your utility company to process your request or to pull a permit.
If you run into one of these unprofessional scam artists, send them down the road.
A city permit for an electrical panel upgrade is fairly easy to obtain and most municipalities have a standard form to fill out to simplify the process.
Once the permit is pulled you will be able to move on to the next step of the electrical panel upgrade process.
Not sure how to handle permits? 📞 Call Landers Electric today at (760) 690-7517 — or Text Us anytime — we pull all required permits and handle the paperwork for you.
Step 4: Schedule Pre-Meet With Trench Inspector (Underground Service Only)
Steps 4, 5, and 6 apply only to what we call underground services only.
Before we go any further, it’s important to understand the difference between overhead and underground electrical services.
An overhead electrical service is very easy to identify.
If you walk outside and see power lines above your head with one set of wires running to the conduit above your electrical panel, you have an overhead service. (see pictures below)
An underground electrical service would be one that has no overhead power lines.
In addition, if you look around your neighborhood and you see green transformers (see image below), that’s a good sign you have an underground electrical service.

Electrical Panel Upgrade Overhead Service

Electrical Panel Upgrade Underground Service Transformer In San Diego County

Electrical Panel Upgrade Underground Service
Now back to step 4.
After receiving a work order and pulling a permit, the next step for an underground electrical service is to schedule a pre-meet with a trench inspector.
Here in San Diego, the trench inspector works for SDG&E.
Their job is to ensure that the new underground conduit is installed according to SDG&E’s standards.
This meeting will help both the homeowner and electrical contractor understand what is required for the underground portion of their electrical panel upgrade so the installation is completed correctly the first time.
It’s important to remember to call Dig Alert (811) prior to scheduling the pre-meet with the trench inspector.
The work area must be marked out in white paint prior to Dig Alert’s arrival.
You will not be able to schedule the meeting without a Dig Alert reference number.
Step 5: Dig Trench & Install Conduit (Underground Service Only)
Once the trench inspector has provided all the necessary direction for the new underground feeder conduit, the construction can being.
This is when the trench can be excavated and 90 percent of the conduit can be installed. The final 10 percent of the conduit that enters into SDG&E’s handhole or transformer cannot be installed by the installing contractor.
This portion will be installed by a utility contractor after the trench is inspected a second time by the trench inspector.

Electrical Panel Upgrade Trench & Conduit Installation 1
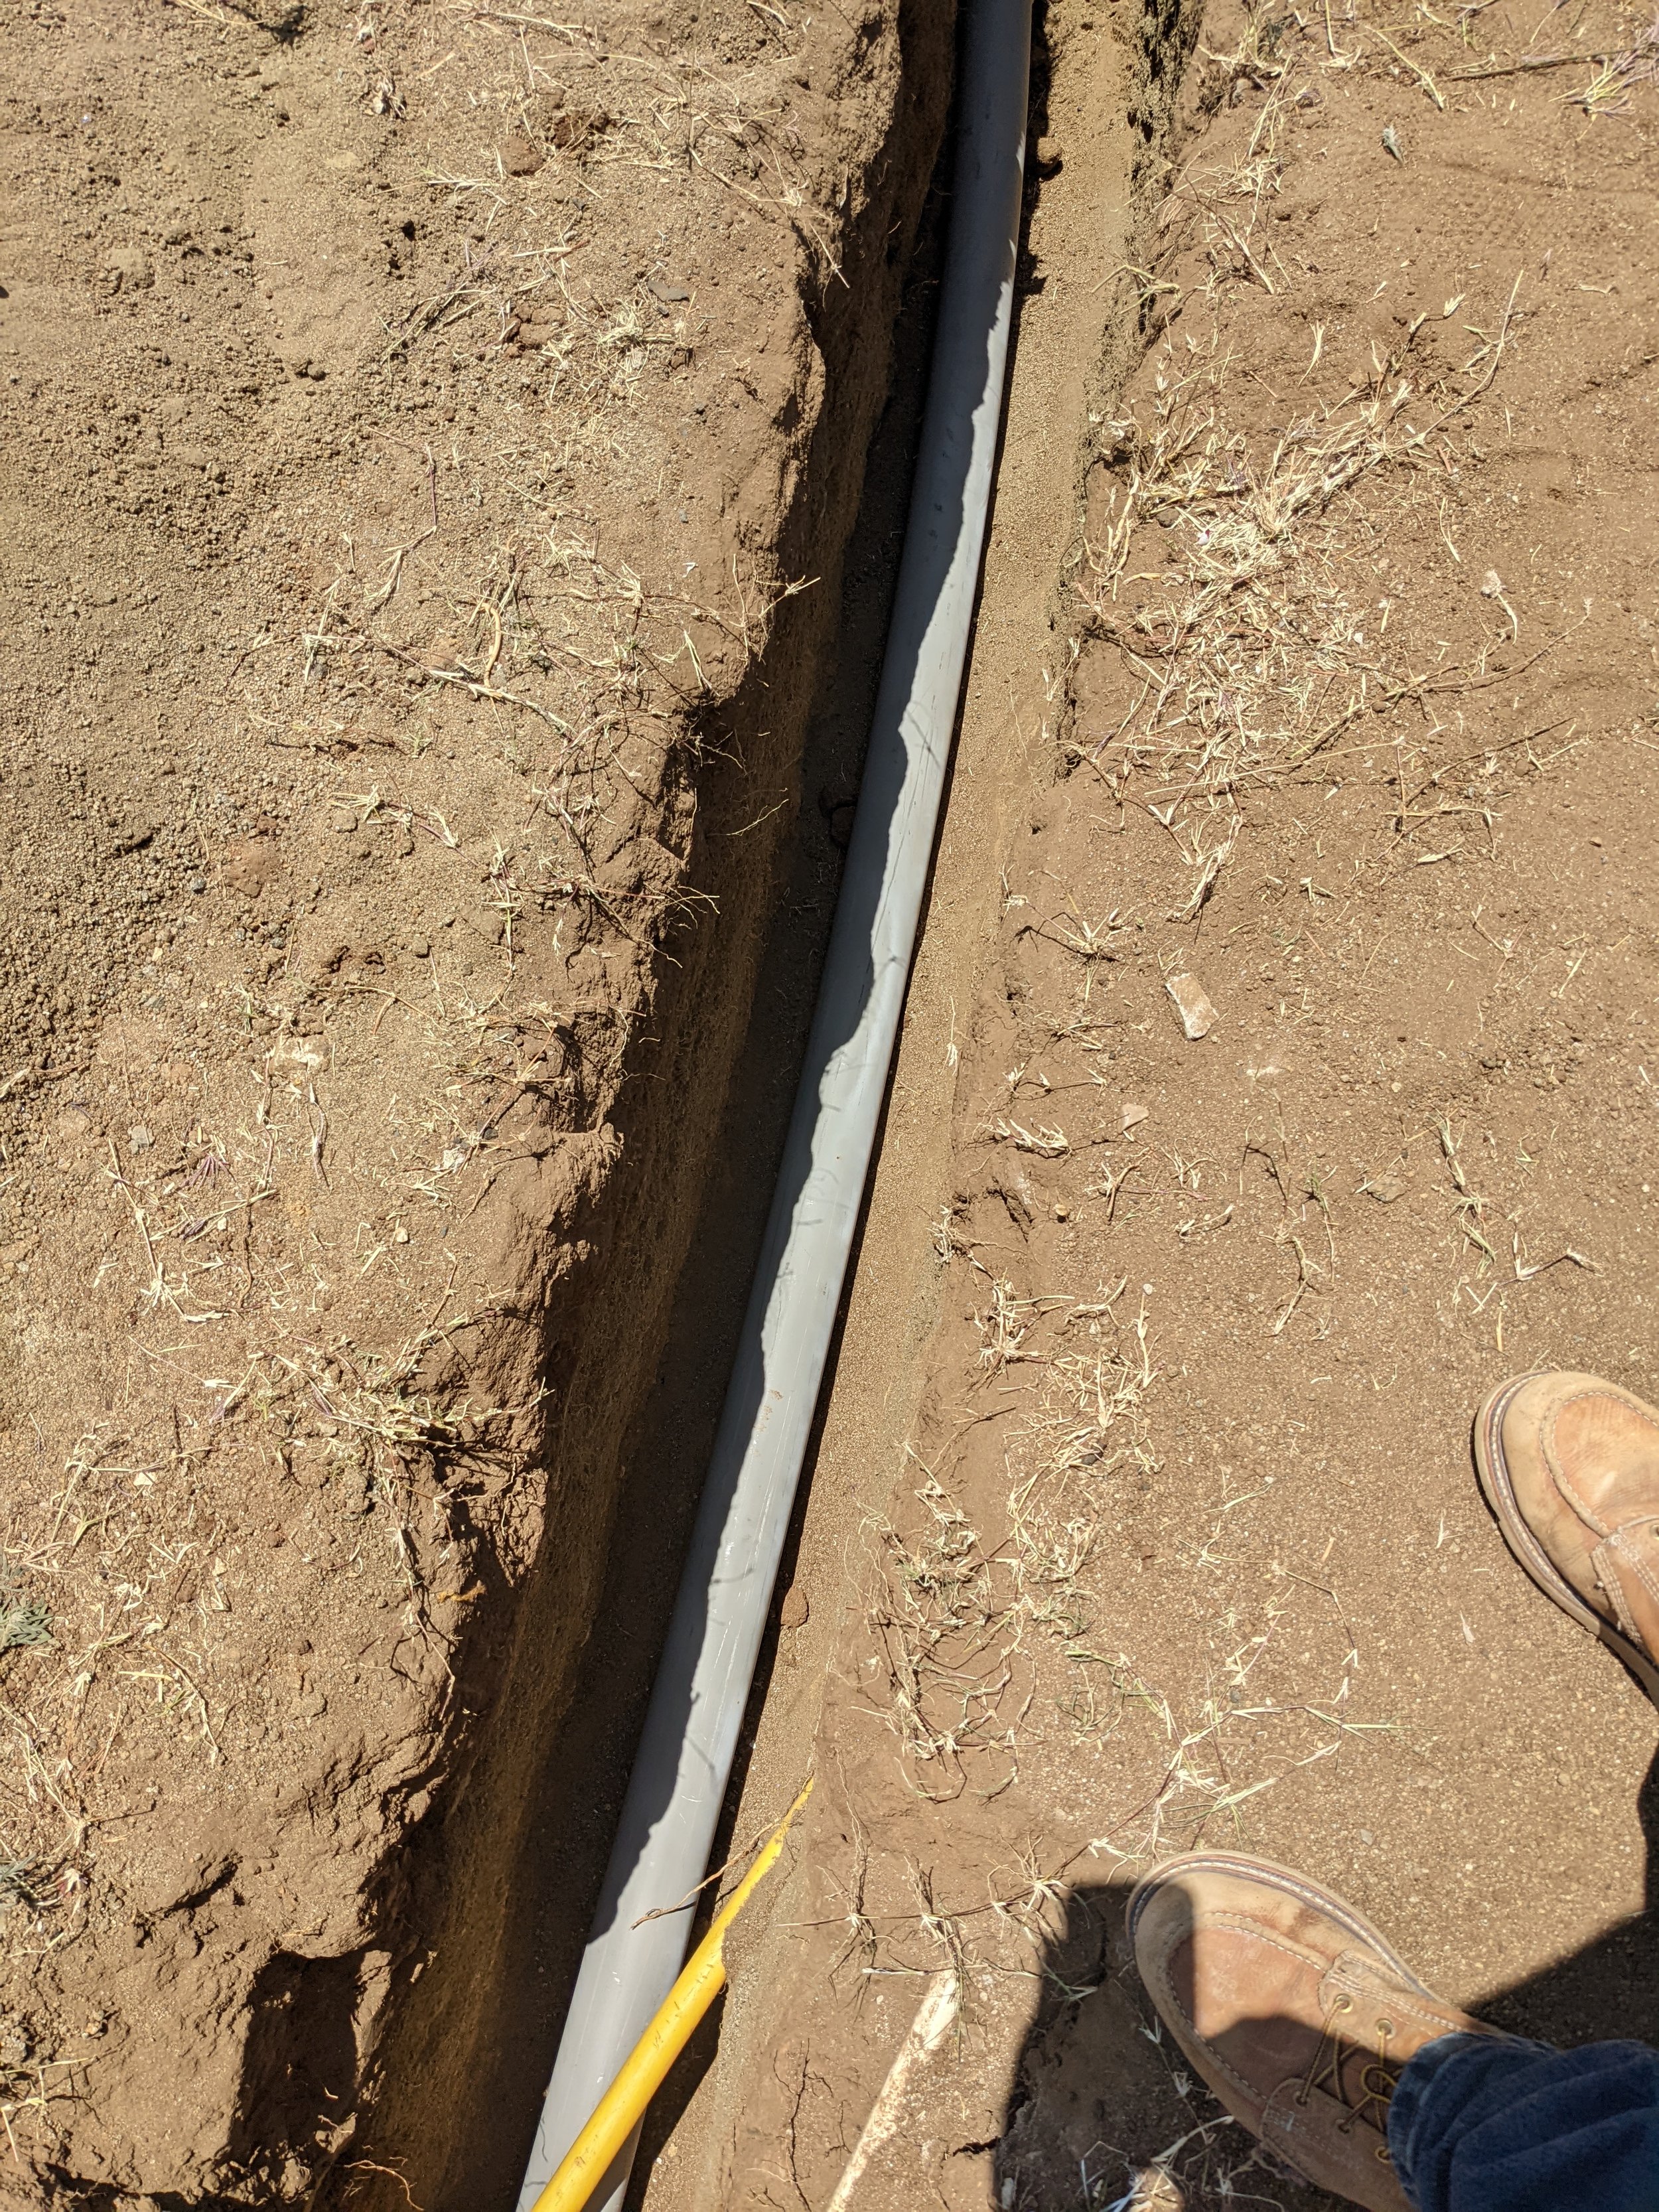
Electrical Panel Upgrade Trench & Conduit Installation 2

Electrical Panel Upgrade Trench & Conduit Installation In San Diego County
Step 6: Trench Inspection & Backfill (Underground Service Only)
As stated in step 5, once the conduit has been 90 percent installed the trench inspector must be contacted a second time to approve the installation of the last 10 percent of conduit entering into the utility company’s handhole/transformer.
If this inspection is passed, you must call a SDG&E’s service coordinator to schedule a crew to come out and complete the conduit installation.
After the conduit is completed, the electrical contractor is cleared to backfill the trench and repair any driveway/sidewalk/street that was removed to dig the trench.
Once all this has been completed, the trench inspector must be called one last time to approve a final inspection on the underground work.
If the inspection is approved, the electrical panel upgrade can continue to step 7.
Step 7: Schedule Disconnect/Reconnect
Steps 4, 5, and 6, were strictly for underground electrical services.
Steps 7-12 are back to being applicable to both overhead and underground electrical services.
The step we’re on, step 7, is to schedule what is called a disconnect/reconnect.
The disconnect/reconnect refers to the electrical power at your home being disconnected and then reconnected.
The date you schedule a disconnect/reconnect, is the date the old electrical panel will be removed and the new one installed.
A disconnect/reconnect can be scheduled by reaching out to the project’s SDG&E service coordinator.
Once this is scheduled, the city needs to be notified of the date so they can come out to inspect the work.
Step 8: Utility Company Power Disconnection
Step 8 brings us to the date of the actual electrical panel upgrade.
Early in the morning an utility crew will arrive at the property to disconnect the power.
It’s important to keep in mind that approximately 3 days prior to the scheduled disconnection date dig alert should be called to mark out all other existing utilities (gas, water, AT&T, Cox Cable, Etc...).

Electrical Panel Upgrade Power Disconnection 1

Electrical Panel Upgrade Power Disconnection 2
Step 9: Install Grounding/Bonding System
The National Electric Code requires proper grounding and bonding of all new electrical panels.
This includes (2) ground rods, cold water bond, and electrical panel connection. (see photos below)
Some electrical contractors prefer to install the ground rods prior to the utility power disconnection because a large jackhammer is needed to drive the two ground rods 8’ into the ground.
Once the ground rods are driven, an unbroken solid ground wire sized according to the National Electric Code must connect both ground rods, the cold water pipe, and the electrical panel.
Proper grounding is required by the National Electric Code. If you’d rather leave this step to a licensed pro, 📞 Call Landers Electric today at (760) 690-7517 — or Text Us anytime and we’ll get right back to you.

Electrical Panel Upgrade Grounding and Bonding 1

Electrical Panel Upgrade Grounding and Bonding 2

Electrical Panel Upgrade Grounding and Bonding In San Diego County
Step 10: Electrical Panel Removal & Installation
THIS STEP CAN ONLY BE COMPLETED ONCE THE UTILITY COMPANY HAS DISCONNECTED THE POWER!
Once the power has been disconnected at its origination point, the old panel is removed and the new panel can be installed.
If you have an overhead electrical service, a new riser and weather head will be installed at least 24” above the roof for utility connection.
After the installation the city inspector will visit the site to ensure the installation is in compliance with the National Electric Code.
If the inspection is passed, the city inspector will notify SDG&E and the power will be restored.

Electrical Panel Upgrade Removal and Installation 1
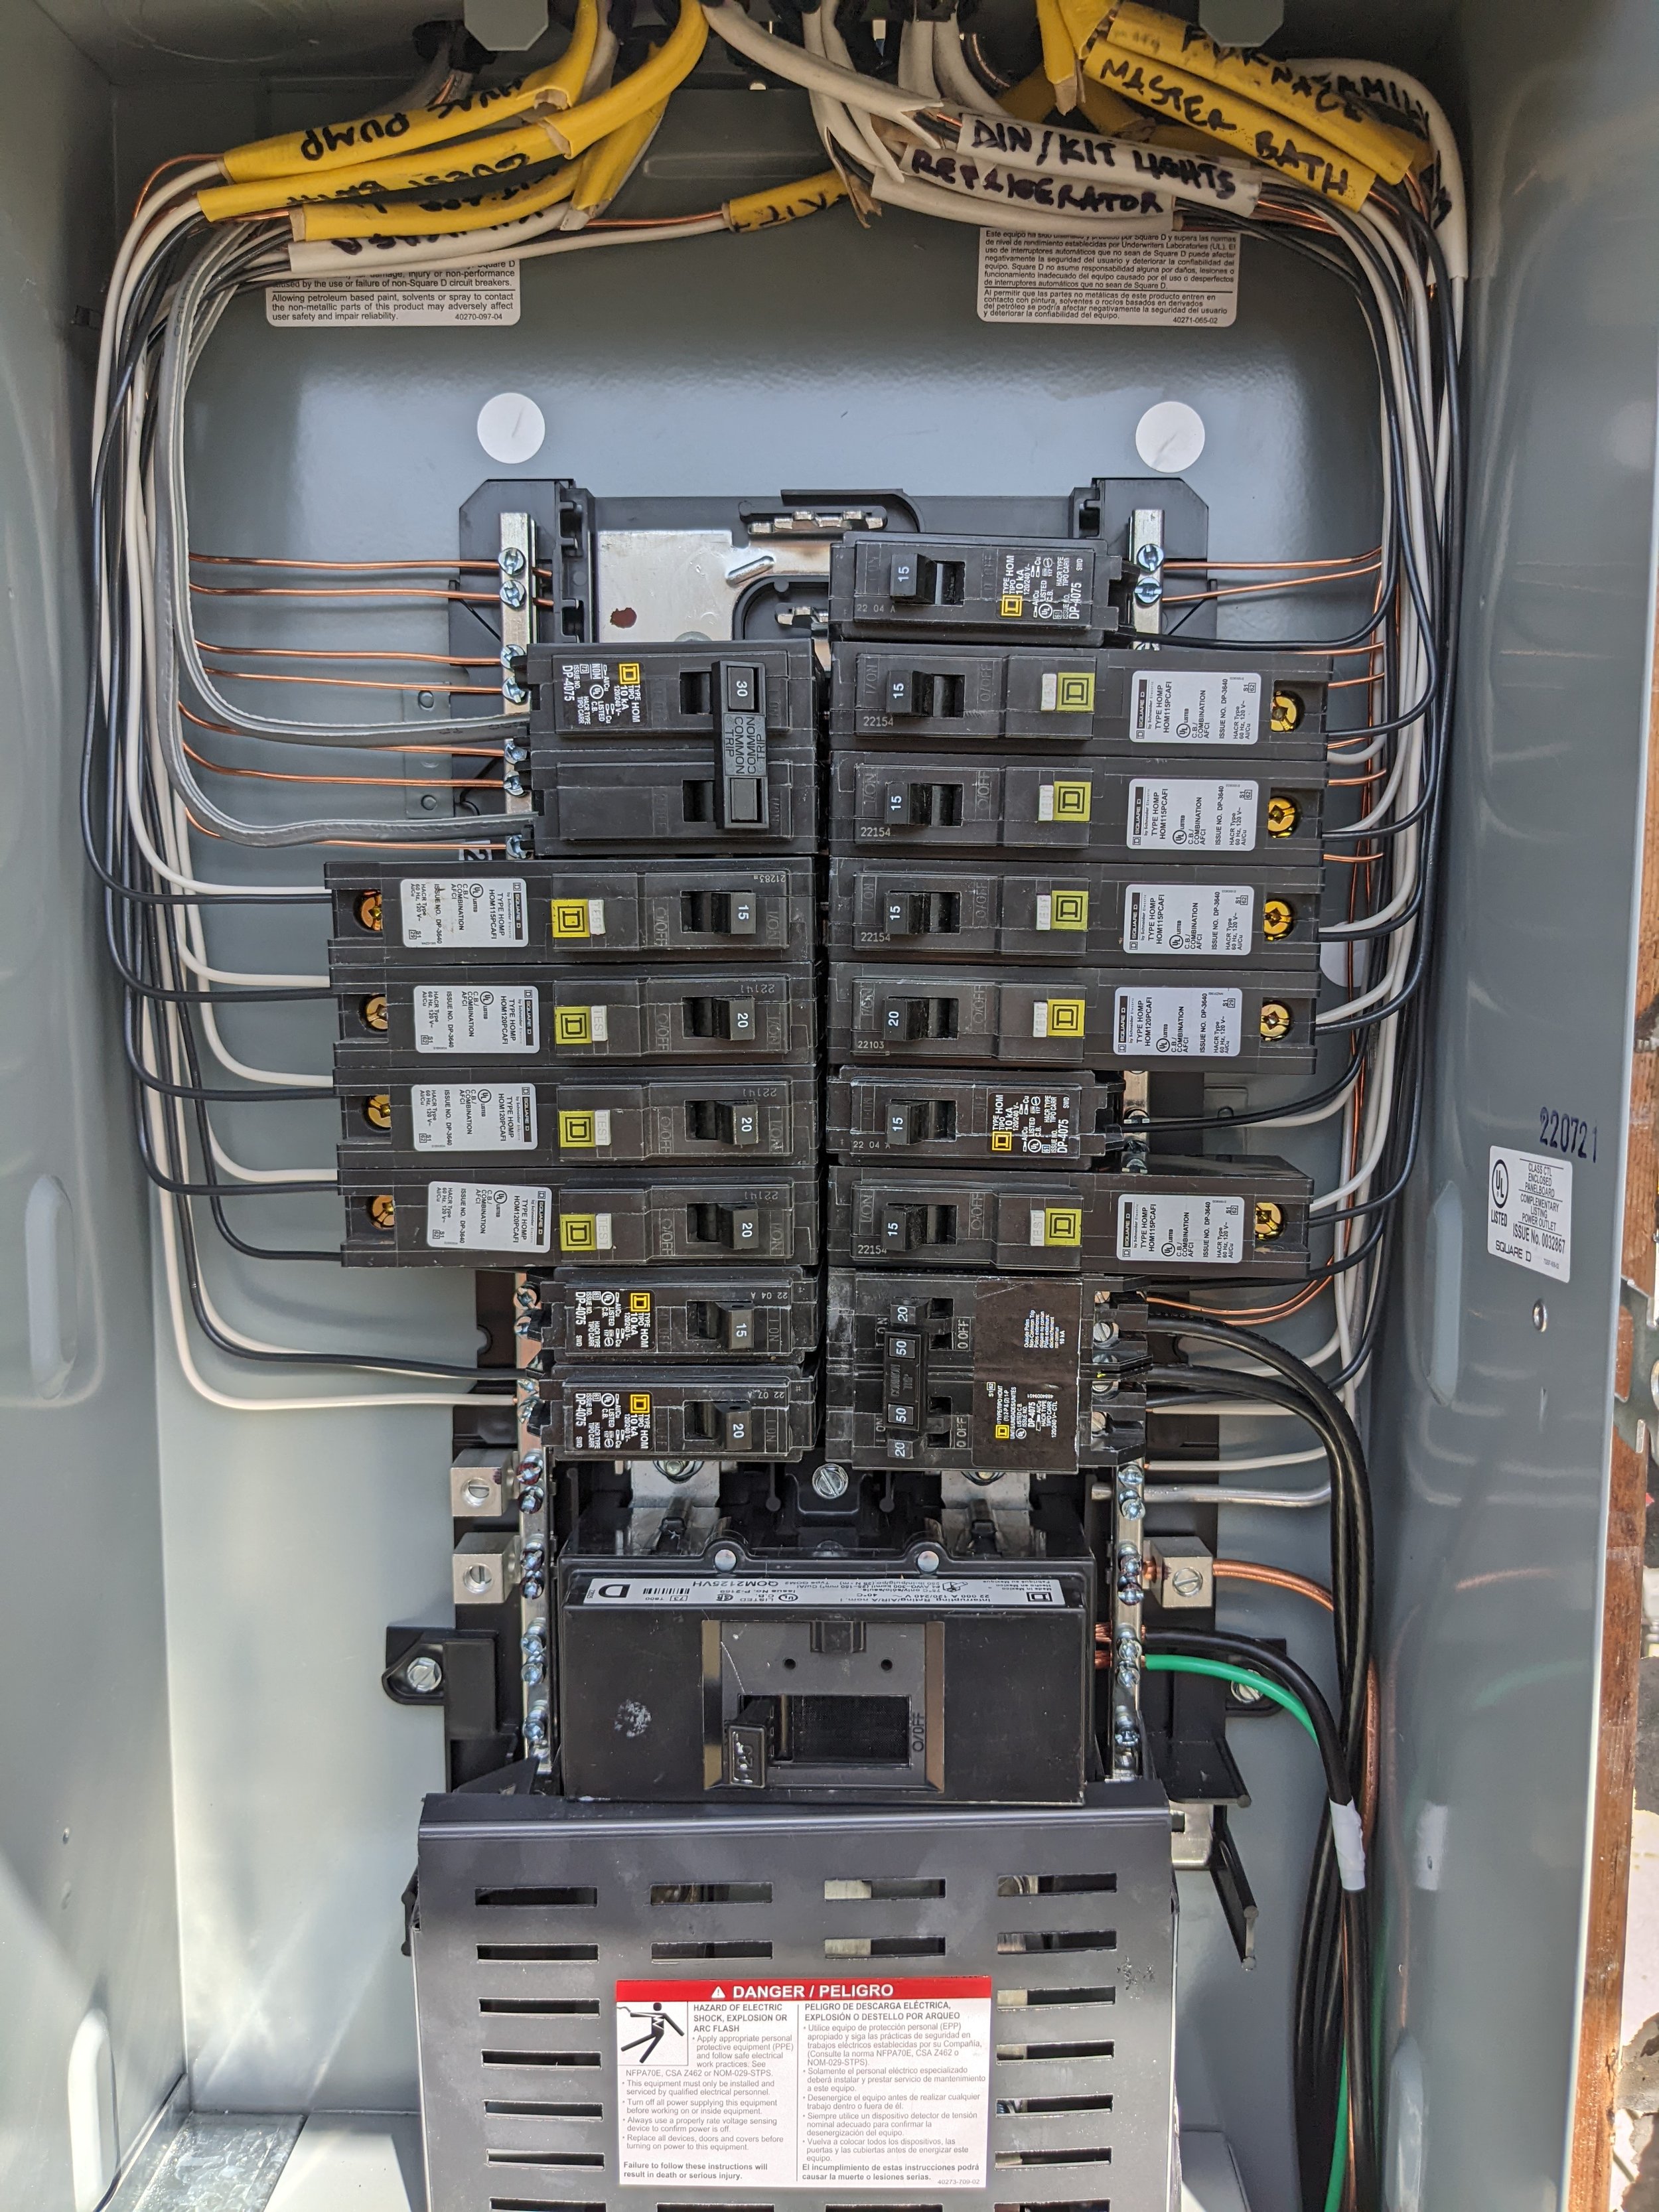
Electrical Panel Upgrade Removal and Installation 2

Electrical Panel Upgrade Removal and Installation 3
Step 11: Repair Stucco/Siding
Removing an electrical panel requires cutting into the stucco/siding.
Repairs will need to made by either the electrical contractor or another contractor.
Only after the required repairs have been made can a final inspection be scheduled.
Step 12: Pass Final Inspection
The final inspection is the last milestone in the electrical panel upgrade process.
Remember that the stucco/siding and waterproofing must be repaired and the affected area must be painted in order to pass final.
Once the final inspection is approved the electrical panel upgrade is complete!
✅ When you hire Landers Electric, we stay on the job until the city inspection is passed and your power is safely restored. 📞 Call Landers Electric today at (760) 690-7517 — or Text Us anytime and we’ll get right back to you.
Frequently Asked Questions About Electrical Panel Upgrades In San Diego County
❓ What are the signs I need an electrical panel upgrade? Common signs include flickering lights, frequently tripping breakers, a burning smell coming from the panel, or if you plan to add a new appliance that requires more power, like an EV charger or a hot tub.
❓ What is the average cost of an electrical panel upgrade in San Diego? The cost can vary based on several factors. A simple overhead service panel replacement is typically less expensive than an underground service, which requires trenching and is a more extensive job. You'll need a professional quote for an accurate estimate.
❓ How long does an electrical panel upgrade take? Most standard electrical panel upgrades can be completed in a single day. However, the entire process, including inspections and utility company service changes, can take several weeks from start to finish.
❓ Is a 100-amp panel enough for my home? For most modern homes, a 100-amp panel is no longer sufficient. A 200-amp panel is now the industry standard, as it can handle the power needs of modern appliances, multiple air conditioning units, and EV chargers without an issue.
❓ Can I do a panel upgrade myself? No. An electrical panel upgrade is a highly technical and dangerous job that involves high-voltage power. It should only be performed by a licensed and insured electrical contractor to ensure the safety of your home and family and to comply with local code.
❓ What is the most common reason for a failed inspection? Failed inspections are usually due to improper wiring, incorrect grounding, or not following the current National Electrical Code (NEC). Using a licensed and experienced electrician minimizes the risk of a failed inspection.
❓ Who do I contact if I need a panel upgrade? If you need an electrical panel upgrade, you should contact a licensed and insured electrical contractor. For reliable, professional service in San Diego County, you can contact Landers Electric at (760) 690-7517 or visit our website at landerselectric.net.
FOR ELECTRICIANS & CONTRACTORS
At Landers Electric, we don’t just upgrade panels for homeowners — we also mentor and train the next generation of contractors. With over 20 years of hands-on electrical and construction experience in San Diego County, I’ve learned exactly what it takes to build and scale a profitable business in this trade.
That’s why I created my live webinar: How to Start a Profitable Construction Company. In this in-depth training, I share proven systems for everything from licensing, estimating, and contracts to hiring, marketing, and scaling your crew. It’s designed for electricians, plumbers, HVAC techs, general contractors, and anyone ready to take the next step from the field into ownership.
If you’re serious about starting your own company — or taking your current contracting business to the next level — this webinar gives you step-by-step guidance from someone who has built a successful electrical company right here in San Diego.
As always, if you need a licensed professional to handle your electrical panel upgrade, please don’t hesitate to reach out.
At Landers Electric, we take pride in completing every panel upgrade safely, code-compliantly, and on time — giving you peace of mind that the job is done right.
– Stephan Landers | Owner & Master Electrician | Landers Electric
Landers Electric also provides 200 amp electrical panel upgrades for homeowners in Temecula, Murrieta, and surrounding Southwest Riverside County communities. Many homes in these areas require electrical service upgrades to support EV chargers, air conditioning systems, and modern electrical loads.
Learn more about our Temecula electrical panel upgrade services here
⚡ Looking to future-proof your home or business? We also offer professional EV charger installation in San Diego with licensed electricians handling everything from permits to safe 240-volt wiring.
About the Author
Stephan Landers is a California C-10 Electrical Contractors License holder (CSLB License #1089091) and the founder of Landers Electrical Contracting Inc. With over 20 years of experience, he is dedicated to providing expert advice and quality electrical services in San Diego.
You can view his professional licenses and certifications here:
About Stephan Landers
